In a previous post, we talked about integrating Disqus comments in a Blogger blog . That is just one of the ways to add this commenting s...

In a previous post, we talked about integrating Disqus comments in a Blogger blog. That is just one of the ways to add this commenting system to your blog. If you're the geeky type, you'd want to do it manually, just so you know you can control it and customize it to your liking. It can also come in useful when the Disqus gadget installer isn't working. So today, we'll look at a manual way of installing the Disqus commenting system on your blogger blog.
Note that this method requires you to edit your blog's template HTML, so it is advisable to back up your template before continuing. Also, this method won't work on Blogger Dynamic Views templates.
Adding Disqus comments manually
- From your Blogger dashboard, go to Layout, and then click on Add a gadget in the sidebar
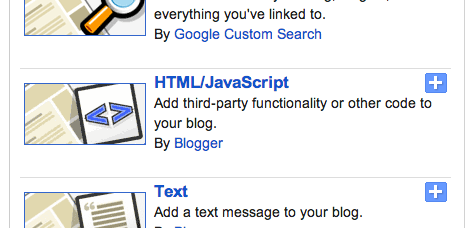
- Select the HTML/JavaScript widget from the list

- Enter Disqus as the title and the following in the content;
<!-- Disqus comments gadget -->
We've added a new widget. It is time to tweak it a bit.
- Now go to the Template section, and go into the Edit HTML mode
- Find the widget you just created by searching for 'Disqus'. You should see something like this;
<b:widget id='HTML1' locked='false' title='Disqus' type='HTML'>
- Add a mobile='yes' key-value pair in that line. It will now look like this;
<b:widget mobile='yes' id='HTML1' locked='false' title='Disqus' type='HTML'>
- Now delete the following code before the closing widget tag...
<b:includable id='main'>
<!-- only display title if it's non-empty -->
<b:if cond='data:title != ""'>
<h2 class='title'><data:title/></h2>
</b:if>
<div class='widget-content'>
<data:content/>
</div>
<b:include name='quickedit'/>
</b:includable>
- ...and replace it with the following code;
<b:includable id='main'>
<script type='text/javascript'>
var disqus_shortname = 'CHANGETHIS';
var disqus_blogger_current_url = "<data:blog.canonicalUrl/>";
if (!disqus_blogger_current_url.length) {
disqus_blogger_current_url = "<data:blog.url/>";
}
var disqus_blogger_homepage_url = "<data:blog.homepageUrl/>";
var disqus_blogger_canonical_homepage_url = "<data:blog.canonicalHomepageUrl/>";
</script>
<b:if cond='data:blog.pageType == "item"'>
<style type='text/css'>
#comments {display:none;}
</style>
<script type='text/javascript'>
(function() {
var bloggerjs = document.createElement('script');
bloggerjs.type = 'text/javascript';
bloggerjs.async = true;
bloggerjs.src = '//'+disqus_shortname+'.disqus.com/blogger_item.js';
(document.getElementsByTagName('head')[0] || document.getElementsByTagName('body')[0]).appendChild(bloggerjs);
})();
</script>
</b:if>
<style type='text/css'>
.post-comment-link { visibility: hidden; }
</style>
<script type='text/javascript'>
(function() {
var bloggerjs = document.createElement('script');
bloggerjs.type = 'text/javascript';
bloggerjs.async = true;
bloggerjs.src = 'http://'+disqus_shortname+'.disqus.com/blogger_index.js';
(document.getElementsByTagName('head')[0] || document.getElementsByTagName('body')[0]).appendChild(bloggerjs);
})();
</script>
</b:includable>
- In the code above, change the text CHANGETHIS to your own forum shortname, e.g. MyBloggerTricks.
You now have Disqus installed on your Blogger blog! You can now the widget to you liking!


COMMENTS